top of page
  • Jun 29, 2023

Introduction:

Hey there, fellow DIY enthusiasts! Get ready to join me on a rollercoaster ride of laughter as I share my electrifying (not literally, thankfully) journey of powering up the Sprouties' grow room. Brace yourselves for an uproarious tale filled with outlet mishaps, hole-drilling wonders, and the quest for the perfect AC setup. So, grab your tools, put on your DIY hat, and let's dive into this side-splitting adventure!

Chapter 1: Shock Therapy for Sprouties

Thanks to the help of an electrician, the Sprouties' grow room finally has its own power! I had the brilliant idea of roughing in two new circuits to make it happen. One circuit is exclusively dedicated to the fancy mini split (AC, heater, & dehumidifier), while the other circuit handles the lights and fans with a whopping five outlets. With 20 amp breakers installed, I was crossing my fingers, hoping my DIY electrical work wouldn't give me any shocking surprises—unless we're talking about the electrician's moves, which were a sight to behold!

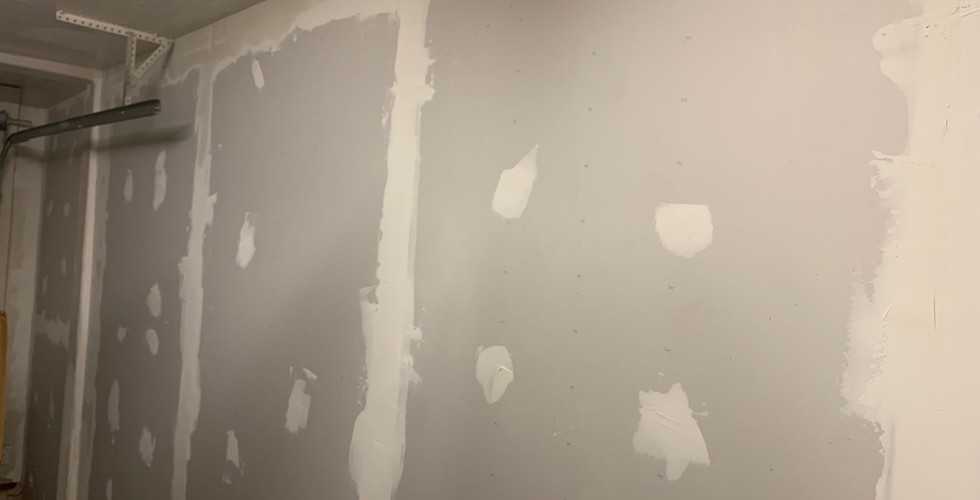
Chapter 2: Outlet Olympics

To save some hard-earned cash, I decided to trim out the outlets myself after finishing the drywall. Now, let me confess—I'm no outlet expert. In fact, I've only replaced a couple of outlets in my life. So, I swallowed my pride and asked the electrician for a quick lesson. Armed with newfound knowledge and the support of my trusty dad, we tackled the drywall installation. With memories of the lesson replaying in my head, I started installing the outlets. Cue the comedy of errors, tangled wires, and moments of confusion over which wire goes where. But hey, I managed to soldier through and installed all of them! The real moment of truth? Flipping those breakers. Miraculously, everything worked like a charm! I could finally bid farewell to the extension cords and plug my new AC into the wall. Sayonara, tripping hazards!

Chapter 3: The Hole-y Conundrum

But alas, another challenge awaited me—dealing with the AC exhaust. My garage lacked a window for a conventional exhaust setup, so I had to come up with a creative solution. Armed with a trusty drill and a 3/8-inch masonry blade (and a dash of DIY optimism), I ventured forth. Here's the kicker—I didn't own a Sawzall, the ultimate tool for the job. Undeterred, I decided to make do with what I had. Picture me drilling about 30 holes in a circle and punching my way through the stucco exterior. It may not have been the prettiest hole in the world, but hey, it worked! And guess who gave it the paws-up approval? My dog, Katniss. With her wagging tail and bark of satisfaction, I knew I had conquered the DIY kingdom—quirky holes and all!

Conclusion:

And there you have it, my fellow DIY adventurers, the uproarious chronicles of my electrifying journey with the Sprouties' grow room. From outlet antics to hole-drilling heroics, this tale serves as a reminder that sometimes the funniest moments happen when we step out of our comfort zones. So, embrace the laughter, relish the imperfections, and keep on DIY-ing with a smile. May your future projects be filled with as much joy and hilarity as my Sprouties' grow room! Happy DIY adventures to you all!


  • Jun 27, 2023

I had decided that the best place for me to grow a lot of microgreens was going to be in my garage. I have a 3 car garage and only 2 vehicles so I could rearrange, organize and fit everything in the larger part leave a full car bay to grow. Unfortunately I live in AZ, and my garage gets to about 115 degrees in the summer, so I would need to air condition it. Cooling an uninsulated 3-car garage would be very costly so I needed to build a wall. I did a lot of researching and learned the basics of building a wall in the garage.

I bought a bunch of lumber and got to work. My 79 father was kind enough to help me frame the wall out. He is an amazing engineer and has built many structures. I had

researched attaching the wall to the foundation using lag bolts but he insisted on using a new toy he bought which shoots a nail through the cement using a .22. When I complained that it would be way too loud shooting a .22 in a closed garage, he handed me a pair of ear protection. Today's generation will never understand the relationship between a boomer parent and and a Gen X kid! Needless to say we made short work of attaching the pressure-treated lumber to the concrete floor.

Attaching the top plate was harder than I anticipated. The location where I wanted the wall did not have a rafter directly above it so I have nothing solid to attach it to. Again my dad stepped in and explained how to construct a double top plate and attached at the sides. After getting that up, putting up the studs 16 inches apart was fairly easy using a pneumatic framing gun.

Unfortunately at this point I had to pause again. I didn't have any electrical outlets on that side of the garage and I was going to need a lot of power for the AC, lights, and fans. I would need to add at least 1 circuit. Electricity is something I'm not comfortable working with so I decided to call in an electrician. I had the electrician rough in 2 new circuits and install 20 amp breakers on them. One would be a dedicated circuits for the AC with only 1 GFI outlet. The other circuit would have 1 GFI outlet and 4 basic outlets for the lights.

Updated: Jul 3, 2023


I'm a few months in creating this business, and it occurred to me that just like I'm sharing with my friends on Facebook, others might be interested in this journey. I've decided to write this blog to document my progress and share my experiences.

My name is Kim Cobb and for the past 21 years, I've been a Science teacher in AZ. I taught many levels, from 5th grade to adult but middle school was my favorite. It was actually some of my students who inspired me to write this blog as many of them wanted to stay updated on my progress. (Shout out to my Horizon Honors students!) Even though I've been teaching, I have a B.S. in Business Administration and always wanted to own my own business. I've done small things in the past like selling jewelry on Etsy and I

have a small TPT store. (Which I hope to continue to grow.) When I learned about microgreens, I thought it was something I really might be able to do. The start up cost are relativily low compared to other businesses and I could grow and work from home. I did hours and hours of research on microgreen businesses. I've watched countless hours on Youtube and listening to podcasts and I decided to give growing a try. I bought a small amount of seeds in a few varieties (radish, mild salad mix, spicy salad mix, and broccoli). I bought 20 shallow 10 x 20 trays from

Bootstrap Farmer, 10 with holes, 10 without. I bought 1 small brick of coco coir (amazing growing material made

of ground coconut husks). I had a metal rack that worked perfect. I strapped a couple of 20 watt shop lights to each shelf and capped it off with a CPU fan for airflow. I set it up in my living room and away I went growing trays.

I, in no way have what you would call a green thumb. In fact, among my family and friends I'm known as the plant killer. So after a few days of growing when I dumped a tray, and had to throw out 2 others due to mold, I wasn't really surprised, but I was determined to keep growing and get it right. My 3rd tray was pretty good. It was a little over-watered but I got a decent yield from it and it tasted so fresh and crisp!

I was inspired to keep going so I got more seeds (sunflowers, green peas, red kale, red cabbage, and more radishes).

By this point I was really getting the hang of it. To get a great yield, you have to figure out the best sowing rate and water for the crops, and I started to figure it all out. I could do this! I could start a microgreens business and make it profitable, so I thought.

In March I got my LLC and licensing set up. Before I could start growing large scale, though I would need to create a temperature controlled grow room in my garage. I currently have a 3 car garage. To cool that in the AZ summer would cost a fortune so I would need to build a wall. That would be a huge project, so I waited to begin until school was out.

©2023 by Sprouties, LLC.

bottom of page